
- Lines & Rigging
- Sailboat Standing Rigging

Swage Terminals
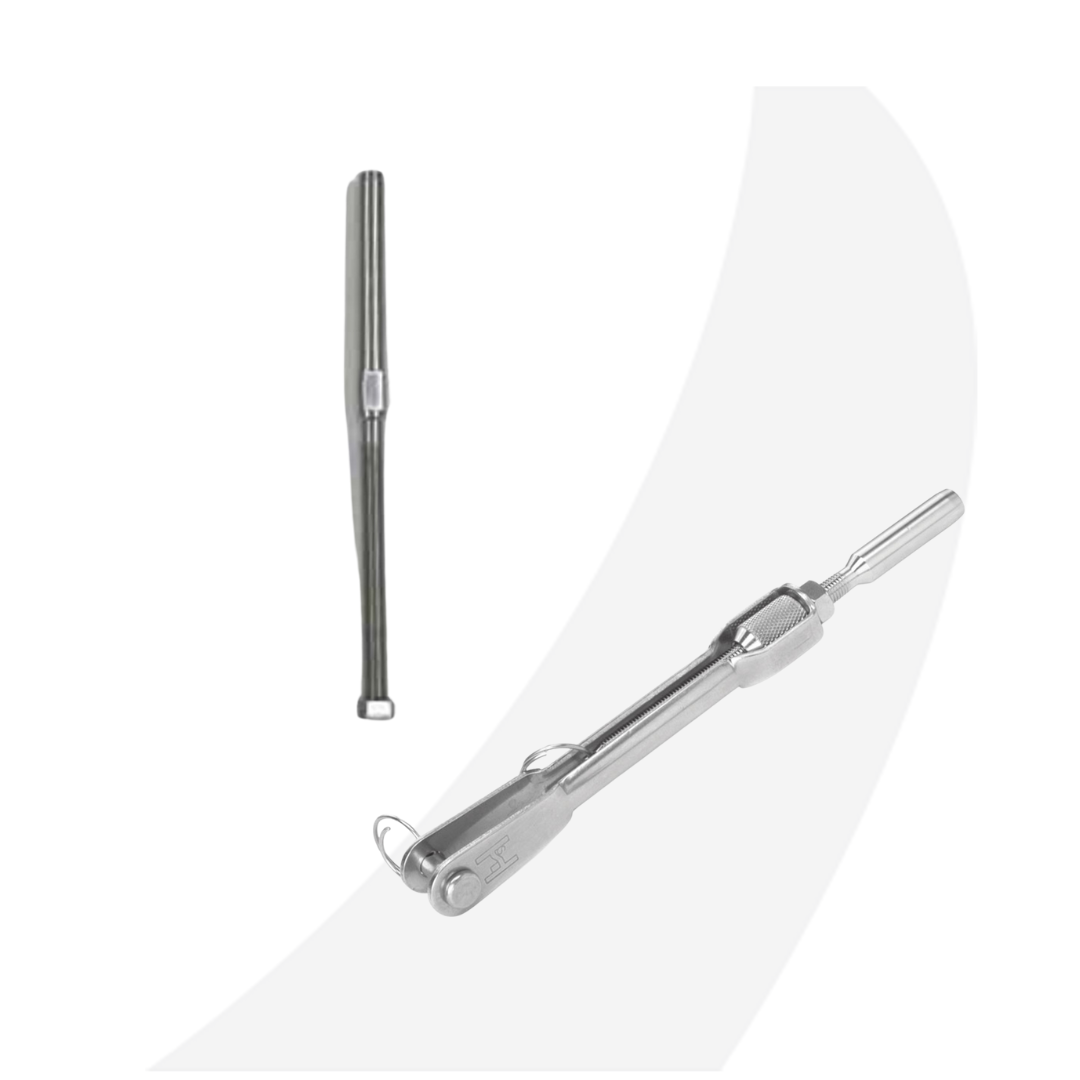
Johnson Marine Stanchion Terminal 1/8
Johnson Marine Stanchion Terminal with Solid Button 1/4
Johnson Marine Stanchion Terminal with Solid Button 3/16
Johnson Marine Stanchion Terminal with Solid Button 1/8
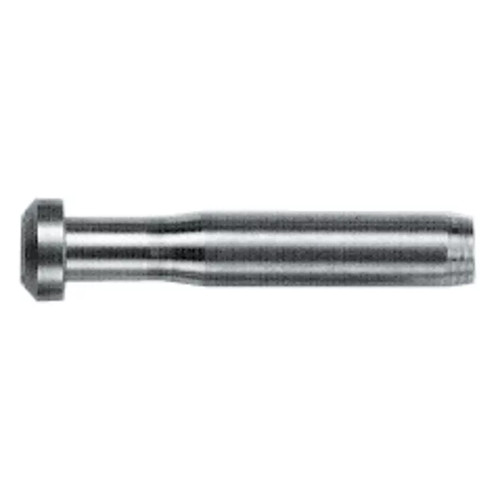
Johnson Marine Stanchion Terminal with Solid Button 5/32
Swageless Mechanical Fittings or Swage Terminals…

…Which do you prefer?
When talking about wire standing rigging for sailboats, there are two primary ways to secure a fitting to the end of the cable, the swage fitting and the mechanical fitting. One requires a specialized, expensive machine (pictured below) that is used to essentially squeeze or hammer the fitting onto the wire, this is called the swage fitting. The other simply requires the use of some wrenches (a vise is a great tool here too), some thread locker, a bit of patience, and some experience wouldn’t hurt either ;0). The latter is referred to as the mechanical or swageless fitting.
SWAGE FITTINGS:

Yes, there a few other types of swaging techniques which we might save for another time. One of which we commonly refer to as the “Nico Press”, a generic term. This is an entirely different ‘box of frogs’ all together. If you are interested read more on that here , written by our friends at Sailing Services .
[youtube https://www.youtube.com/watch?v=cLM-crQeN-A&w=560&h=315]
SWAGELESS (MECHANICAL) FITTINGS:

Our favorite high quality mechanical or swageless terminal manufacturers are: Hayn Hi-mod and Stalok . Let us not forget Noresman (Navtec), one of the more popular fitting manufacturers on the market up until recently, as they have since shut down production. A mechanical fitting is typically a three part fitting (sometimes four) . This type of fitting does take a bit longer to execute than the swage fitting, even by the most experienced of rigging technicians. The real bonus here is it does not require a ridiculously expensive machine. Which makes it a very appealing product for the DIY project.
.[youtube https://www.youtube.com/watch?v=QTGB_kfTxUg&w=560&h=315]
PROS AND CONS:
There does appear to be some controversy about which type of fitting is better, so I’ll try to clear things up a bit. Let’s take a moment to talk about the pros and cons regarding these two styles of wire terminals. Swage fittings require one of these expensive machines, so you will likely have to pay someone to do it for you. Whereas Mechanical fittings can be the perfect solution for the DIY sailor. Swage fittings are substantially less expensive than mechanical fittings. For example, a swage stud for 1/4″ wire with 1/2″ thread retails for around $25 and the comparable mechanical fitting retails around $75. Multiply that times the amount of fittings you’ll need and it can make quite a difference in price when replacing an entire rigging set.

Having said all of that, a properly made swage fitting will last about 7-20 years or roughly 25,000 nautical miles, depending on geographical region and use before replacement is recommended. Regular inspection , regardless of fitting choice, is always recommended with service intervals around every 3-5 years.

We, at TRC, recommend using swage fittings over mechanical fittings when the stay is rigged with a furler, i.e. forestay.
There are also hybrid sets made, utilizing both types of fittings, with Swage fittings at the top of the stay and mechanical fittings at the bottom. This is the meet in the middle solution when price becomes a factor. Also this method is commonly practiced when building new masts.
TRC has had great success with the longevity of our swage fittings over the years {knocking on wood}. I’d say this is attributed to the use of high quality fittings, wire, the right machines, as well as proper execution. We end up selling mostly complete rigging sets using swage fittings. When discussing options with our customers we can really only justify the additional cost of mechanical fittings when the boat is going to endeavor on high mileage journeys. This way the wire can be replaced, the fittings inspected, and re-used with new cones (wedges). One of the other big benefits of mechanical fittings is/was at sea repairs. As the sailor could use wrenches and some Loctite to terminate a new cable at sea if needed, but not without the purchase of some good quality wire cutters (not cheap). With developments in synthetics we think that this problem can be much easier overcome with the use of Dyneema or Vectran . We offer a TRC Spare Stay Kit specifically for this purpose…no tools required!

Either fitting, if not made properly, will have issues and can cause failures. Conversely, when done properly, either of these fittings will provide the boat and its crew with many years of trouble free service. With either fitting, given that they were executed properly, age, geographical location, and wear are the biggest enemies for standing rigging longevity.
RIGGERS TIPS FOR MAKING UP SWAGELESS TERMINALS :
First, when choosing a mechanical fitting ensure that it is for the correct wire type being used, i.e. 1×19 , 7×19 , and dyform/compact strand . you’ll need to disassemble the mechanical fitting (with sta lok you can leave the former inside of the fitting) and then read the directions which should be included (or can be found online). the general gist for any mechanical fitting (regardless of manufacturer) goes as follows: start with a nicely cut end of wire. then the socket portion of the fitting gets slipped onto the wire..

Next, the end of the wire must be unlaid evenly (the tricky part), so that the core strands are exposed and the cover strands are evenly splayed open.
Once that is done, the cone (or wedge piece) is pushed onto the core strands. with the outer wires surrounding the cone evenly, work the socket back up to the end of the wire, and re-lay the cover strands onto the core. do this until the outside strands protrude from the end of the socket evenly and parallel (as pictured below), and the socket cannot slide up any further., this is all done while keeping the cone (or wedge) appropriately submerged below the end of the cut wire by the recommended amount. the amount of core stick out varies by fitting manufacturer, so read the directions and follow the guidelines closely. the outer wires cannot be flared out (see diagram 2) and must be parralel or curved-in slightly. you will not be able to assemble the fitting properly (or at all) if you don’t get this step right. now, (unless using a hi-mod fitting for which you will need to rig their “crown ring” in place) you are ready for the fitting to be screwed together and to form the wire. to do this we use loctite primer and red loctite to help lubricate things as shown in the video above., warning: stainless on stainless will gall (or cold weld) with too much friction and you’ll have a fitting that can’t be screwed-on or off. , once screwed down completely we recommend that the fitting be unscrewed again before the loctite activates (so hurry depending on temp) and checked for proper forming of the cover (outside) strands. lastly, if all looks to be fine, we coat the threads with more red loctite and then screw it back together tight some manufacturers recommend the use of sealants along with loctite into the fitting before the final assembly to mitigate water intrusion and to help secure things. recently it seems that most manufacturers are getting away from this, perhaps because of oxygen deprivation causing corrosion. so again, please follow the instructions and guidelines that come with the fittings that you have., …so there it is in a nutshell. as i always say, seek the council of your local rigger for product specific information as well as any tips and tricks so that you have it right., thanks for the read and leave us your comments below ., similar posts, the new hallberg rassy.
Take a look at the new HR 412 presented by Yachting Monthly. I love the below deck furler allowing for a deck sweeping headsail, sporty! This is a beautiful boat featuring some of the latest and greatest rigging technology. Check it out. [youtube http://www.youtube.com/watch?v=lw-LawBeoH8&w=560&h=315]
ANNAPOLIS BOAT SHOW 2017!!
The Boat Show is back and so are we. Bigger and better than ever before, TRC has recently expanded its team and its booth. We have joined up with BSI Denmark to provide our customers with top quality Rod Rigging fittings. So come by our booth, see our new digs, and talk to BSI and…
Rolex Big Boat Series
The 50th Anniversary of the Rolex Big Boat Series hit the San Francisco Bay about two weeks ago. Here are a few of the always fun to watch highlights. [youtube https://www.youtube.com/watch?v=F_2JZFu8LlY&w=560&h=315] Video brought to you by T2pTV’s YouTube Channel.

Views from Aloft
An absolutely GORGEOUS day on the bay. This trip aloft was to retrieve a skyed main halyard and conduct a basic visual safety inspection. This was our first ‘Views from Aloft’ this year, taken last month on the Magothy River in beautiful Arnold Maryland. I have to say the Island Packet 38 is one of…
VOR Takes a Break and The Dhows Set Sail!
Enjoy this short clip of this large and unique racing fleet in Abu Dhabi. Beautiful! [youtube http://www.youtube.com/watch?v=oUXx7HP6Irg&w=560&h=315]
Americas Cup Epic Crashes….
Check out the AC 45’s best wipe out moments……. [youtube http://www.youtube.com/watch?v=S-FlN97Y3ok&w=560&h=315]
Leave a Reply Cancel reply
Your email address will not be published. Required fields are marked *
Save my name, email, and website in this browser for the next time I comment.
11 Comments
This is not a comment but rather a product request. I need 4 U-shaped toggle jaws which are part of the standing rigging on my 30′ Hunter sloop. They are 2 1/4″ overall length by 1″ wide. They hold a 1/2″ diameter by 1″ slug at the top of solid threaded rigging. Any direction you can give would be appreciated. Bob Carr [email protected]
Thanks for the question. I think I know what you are after, but please email us an image at [email protected] . We can likely decipher your needed item once you send us a pic to confirm.
Cheers, ~T.R.C.
Thanks for your directions and tips on mechanical fittings. I have to change out the two forward port and starboard standing rigging because of on the port side of the mast below the shroud is pulling out. I will drill new holes, compression fitting inside with a lap patch over the outside of the mast. Once that is done will install one ear on each side to take the pin for the new Hi-Mod Mechanical fittings. I do hope I measure correctly as where I will be doing this besides up the mast is in a place with not many parts so taking it all with me in the next week.
I will try my best to take photo but I am doing all this single handed so may not take as many as I should.
I used a lot of Stalok fittings for a (not boat-related) job, and although they are straight-forward I found them rather tedious to make-up. For that reason alone I chose to try Hayn Hi-MOD for my boat, and ohmigosh they are fast and easy compared to the Stayloks! I started off with one: had a kinked shroud – it was easy to run a new shroud with a swaged stemball fitting and put the Hayn fitting on the bottom. Great! My boat was missing two shrouds so I did two more – easy peasy!! Next time I renew the shrouds I’ll do them all!!!
Fast forward a few thousand very stormy miles later (why me??): I pulled the mast and couldn’t remove those three shrouds because the crown rings and wires were STUCK inside the fitting housing. I tried all sorts of penetrating oils, heat, banging, LOTS of heat … and by then the fittings and wire were so abused they were no longer seaworthy so I let everybody (riggers included) try anything they wanted. The boat needs all new shrouds before I go offshore again and when I cut those fittings off I’m going to send them to Hayn and ask for a refund. :-(
It would have been interesting to have had a Staylok fitting or two on the boat for comparison. I really like the Hayn Hi-MOD fittings, but can’t recommend them for blue water (ab)use – I’ll stick with swaged fittings. Plus, with the advancements and reliability of synthetic rigging that’s a MUCH better way to go for emergency repairs and having spare shrouds aboard. And lookie! Someone has already invented a ready-make spare stay kit!! Brilliant. :-)
Very interesting story about those crown rings. To be honest we haven’t had to take many apart as they are relatively new to the US market still. Well about 10 years now (If I really think on it), man time flies. Thanks for the heads up though. I will keep an eye out next time we take one apart.
Priscilla I would like to send you one of our shirts if you like. What Size are you and what is your shipping address?
…and let us know if you need one of our spare stay kits or more information on them.
Serious bummer about the Hi-MODs, one would be ho-hum, but all three?! All are on 3/8″ upper spreader shrouds (dbl spreader cutter rig), two port one stbd, five or six years old (yeah where does the time go?), installed at different times on wires from different rigging companies. Not sure when I’ll pull the mast again, hopefully within a year. I want so much to cut one in half to look, but Hayn needs to figure out the problem and fix it so (unless they say otherwise) I’ll send them all three. You read it here first so of course I’ll keep TRC posted … and I won’t forget, women never forget anything, and don’t argue about that because we are always right. :-D
Ooh, a shirt! I’ll proudly be a walking billboard for TRC – this is a very impressive web site, educational, good annotated pictures – a true (sailing) community service. I’ll wear your shirt to our boat show next month – the local riggers will find out I’m cheating on them. hahaha!
..Can’t wait until everybody sees your new shirt :-0
Great tips! Thank you. I always learn lots when I read your posts. :)
Thanks Viki. I was wondering how you fared down there through that rough weather? Is everyone safe?
Having a few issues with big earthquakes at the moment… but we are ok :)
Good to hear. I heard that it was very close to where sent those shirts! ~T.R.C.
Username or Email Address
Remember Me
Lost your password?
Review Cart
No products in the cart.

- Privacy Overview
- Strictly Necessary Cookies
This website uses cookies so that we can provide you with the best user experience possible. Cookie information is stored in your browser and performs functions such as recognising you when you return to our website and helping our team to understand which sections of the website you find most interesting and useful.
Strictly Necessary Cookie should be enabled at all times so that we can save your preferences for cookie settings.
If you disable this cookie, we will not be able to save your preferences. This means that every time you visit this website you will need to enable or disable cookies again.

Please verify you are a human
Access to this page has been denied because we believe you are using automation tools to browse the website.
This may happen as a result of the following:
- Javascript is disabled or blocked by an extension (ad blockers for example)
- Your browser does not support cookies
Please make sure that Javascript and cookies are enabled on your browser and that you are not blocking them from loading.
Reference ID: 683a0682-0c21-11ef-9cbc-70a58d54a5f1
Powered by PerimeterX , Inc.
JavaScript seems to be disabled in your browser. For the best experience on our site, be sure to turn on Javascript in your browser.
- My Wish List
- Compare Products
- Create an Account
INTRODUCING RONSTAN ORBIT WINCHES™

- You're currently reading page 1
- Turnbuckles & Handles 20 items
- Threaded Swage Terminals Metric Wire 18 items
- Threaded Swage Terminals Imperial Wire 16 items
- Threaded Toggles 4 items
- Threaded Eyes 3 items
- Short Threaded Swage Terminals Metric Wire 13 items
- Short Threaded Swage Terminals Imperial Wire 16 items
- Toggle Swage Terminals Metric Wire 18 items
- Toggle Swage Terminals Imperial Wire 20 items
- Eye Swage Terminals Metric Wire 15 items
- Eye Swage Terminals Imperial Wire 17 items
- Fork Swage Terminals Metric Wire 4 items
- Fork Swage Terminals Imperial Wire 3 items
- Lock Nuts, R/H Thread 9 items
- Split Rings & Clips 6 items
- Clevis Pins 25 items
- Fast Pin 1 item
- Toggle Pins 6 items
- Stainless Steel Thimbles 11 items
- Stainless Steel Sailmakers Thimbles 5 items
- Copper Ferrules 7 items
- Wire Rope Grips 4 items
- Stay Adjusters 5 items
- Chain Plates & Perforated Strip 7 items
- Remove This Item
Need some advice?
Official Sponsors of the Australian Sailing Team

Aside from holes below the waterline of your hull, losing a mast is about the scariest thing that can happen to your boat. Did you see the dis-masting in the movie Master and Commander? This is the stuff of nightmares for a cruising sailor. Since the general advice is to replace wire rigging every ten years most of us have to confront this task at least once during our sailing lives. And even among sailors who take on many repair tasks on their boats, replacing the standing rigging is something many sailors would not consider doing themselves. We are now on our second re-rig (different boats) and can say that, with several caveats, it is a very doable task for most handy folks. In this article I walk you through what we do so you can decide if re-rigging is a DIY task or not for you.
In general, any situation requiring a redesign, whether total or partial, we feel should be done only after consulting with professionals. This includes any situations involving change of materials or geometry. For example if we were going from rod to wire rigging, or from wire to HMPE (High Modulus Polyethylene e.g. dyneema), we would consult professionals. Likewise if we were replacing a mast or spreaders we would involve professionals because these situations create different loads on the rigging and therefore may require resizing the wire or attachment points. And of course if you have any reason to feel that the current rig is not adequate you do not want to repeat those mistakes in the new rig and you will also need a redesign. Get a professional involved in these cases.
You also need a professional shop if you want swaged rigging. But if you want mechanical fittings you can do it yourself. If you currently have swaged fittings, as we did on both the boats we have rerigged, then you will need to research and buy some different terminals, but the design can remain the same. We will talk about what we used below.
However if you feel that your current rig is adequate, just aging, you may wonder what is involved in doing it yourself. Besides saving money on someone else’s labor, you would have the satisfaction of know how your rigging is put together.
Your boat may be quite different from ours, but here is our experience with re-rigging a boat with swaged fittings and converting to Sta-Lok mechanical fittings.
Eurybia is a ketch with one unusual feature – a solid triatic. A triatic is the stay connecting two masts. Usually this is a wire stay, but our boat was designed and rigged with a solid bar running from the mizzen mast to the split backstay of the mast. The solid triatic resists both pushing and pulling so that backstays or swept spreaders are not required on the mizzen. I will not talk much about this feature as most people do not have to worry about this. Everything else about our re-rigging applies to other Marconi / Bermuda rigged boats such as sloops, cutters, ketches and yawls since we are just talking about the wires and the attachments.
Rigging Nomenclature

The Cap Shroud goes from the top of the mast to each spreader and then to the deck beside the mast.
The Aft Lower Shroud goes from the mast just under the lowest spreader to the deck aft of the mast. The Forward Lower Shroud goes from the mast just under the lowest spreader to the deck forward of the mast.
If you have more than one spreader each additional spreader will have its own shrouds that go from the mast just below the spreader above it, through the spreader end, to the deck beside the mast. These can be called the Upper Shroud or Intermediate Shroud .
The Forestay goes from the top of the mast to the bow of the boat – on Eurybia this is part of the jib furler and is not part of this re-rig
The Backstay goes from the top of the mast to the stern of the boat. On Eurybia there is an upper backstay about 20′ long, then a junction where two lower backstays proceed to a point on either side of the boat just aft of the mizzen mast. This junction is also where the solid triatic bar connects to the top of the mizzen mast.
Running backstays go from just under the top spreader to the deck aft of the mast ending with a rope tackle so it can be easily loosened or tightened.
Continuous / Discontinuous . Most boats have shrouds that are a continuous piece of wire as they go past the spreader, others are discontinuous at the spreader requiring additional attachments points here. Eurybia has continuous shrouds and our last boat had discontinuous. It is possible to convert a discontinuous rig to a continuous one but you will have some redesign of the spreader ends.
Eurybia’s main mast has two spreaders and therefore has port and starboard cap shrouds, port and starboard intermediate shrouds, port and starboard lower aft shrouds, and port and starboard lower forward shrouds for a total of eight. There is also a forestay as part of the furling jib and a split backstay. Finally there is a running backstay on either side. The mizzen mast has one spreader and therefore has two cap shrouds, two lower aft, and two lower forward shrouds. There is no backstay or running backstay on the mizzen. The equivalent of a mizzen forestay, the triatic connects the backstay of the main mast.
Rigging Tools And Supplies
Caliper for measuring shroud thickness. Eurybia has shrouds of 1/4″, 5/16″, and 3/8″. For an inexpensive digital caliper see Amazon . Harbor Freight also has inexpensive digital calipers.
Hacksaw for cutting wire. We recommend that you do this manually rather than using an angle grinder or other electrical saw because the speed of the electric saws can affect the strands, even melting them a bit so they are difficult to untangle.

Sawing jig for holding wire and preventing the strands from separating. (see image)
Vise and work table for cutting wire and installing terminals. The vise should have aluminum or brass jaws so as not to mar the stainless terminals.
50-100′ Measuring tape. We used a long cloth tape on a roller such as is used for landscaping. For our 45 foot boat the longest shrouds were 50′ but yours may be even longer.
6′-25′ Measuring tape for measuring the hardware.
A place to lay out and measure the wire . Here in Puerto Penasco, Mexico we are working in a very dusty yard and are using the mast (lying horizontally at working height on sawhorses) as our “table” for laying out wire. First we taped the zero end of the landscape tape to the top of the mast and taped it down every few feet to the foot of the mast. Eurybia is keel-stepped and the mast is longer than the longest shroud – if you have full backstays or are deck-stepped you might have to add another horizontal surface to have enough room to measure the longest wires. The mast track made an ideal place for capturing the wire rope while we measured and cut it.
Notebooks and pens . There are a lot of numbers to capture!
Painters tape and sharpies for labeling the wires.
Velcro Cable Straps or Electrical tape . This is to secure the long lengths of wire in loops so it is easier to handle. We didn’t have cable straps so we used ALOT of tape during the process.
The old shrouds for measuring from. Before unstepping the mast we marked with painters tape the location of the turnbuckles on each shroud so we would know the ideal length of each. While unstepping the mast these turnbuckles will be loosened but the tape allowed us to return to the design length. It is also essential to label each shroud with its position (cap shroud port, lower port fwd, etc) as well as its diameter (3/8″).

The new wire in all the appropriate diameters to match the old shrouds. I think all modern wire rope rigged sailboats use 1×19 stainless wire. Wire can be 304 stainless, or 316 which is a little less strong but more resistant to corrosion. Diameter of the wire MUST match the old wire but the 304 or 316 does not matter. Your preference.
Terminal ends for both ends of each shroud. You will need new mechanical terminal ends for a swaged rig. If your rig currently has mechanical ends, you can reuse these at least once and just replace the cones. If replacing the cones get some extras. Sta-Lok and Hayn still make these parts. Hayn is probably the best and most expensive. If your boat currently has Norseman fittings you will have to decide whether to continue with those parts as Norseman is no longer in business. You can still get the cones from Tylaska if you happen to already have a Norseman system.
We chose Sta-Lok.
Wrench for putting the terminal end on and the vise to hold the terminal eye end while turning the cone end of the terminal. We used a 12″ crescent wrench.
Sta-Lok System

To replace your current eyes at top and bottom of the shrouds with Sta-Lok fittings, go to the Sta-Lok website .
We used Sta-Lok eyes at the top of each shroud. We replaced the swaged toggle on the end of each turnbuckle with a new toggle. Then the pin on these new toggles inserts through the Sta-Lok eye. (see image below)

Basic Steps for Rigging
Make wire cutting jig.
Cut a square piece of wood about 3-4″ on each side. Hardwood would be best but we used epoxied plywood and it was adequate. For each diameter of rigging wire your boat requires drill a hole that size near the corner of the block. Write the diameter near the hole with sharpie. You will insert the wire through this hole in order to hold it for cutting and to prevent the strands from separating.
Using a skillsaw cut a slice in the middle of the block starting at the corner and continuing through the hole you just made. This is where your saw blade will go while cutting the wire.
Repeat at each corner of the block for the sizes of wire you require. (Eurybia used 1/4″ 5/16″, and 3/8″).
Before Unstepping the Mast: Document Existing Rig
Mark Turnbuckles. Assuming your existing rig is currently optimally tuned or close, use painter’s tape to mark the location of the turnbuckles. This will help you to return close to a tuned length.
Label shrouds and chainplates. Label every wire both at deck where it connects and the wire itself. Remember to indicate port or starboard, which mast, which shroud – so “Mizzen Cap Port” or “Main Upper Port” or “Main Lower Port Forward” etc. For the deck markings “Cap”, “Lower Fwd”, “Lower Aft” etc is sufficient.
Measure Old Shroud Assemblies
Unstep the mast.
If you are in a dirty yard like we currently are, using the mast as a place to lay out the wire is far preferable to laying the clean new wire in the dirt. Place the main mast with track facing up on horses at working height (if you wish to use the mast to measure and lay out the wires).

Tape a landscape measuring tape the entire length of the mast track. Secure it every 5 or 10′ down the length. See image.
Remove all the old shrouds. Return turnbuckles to the tension marked by the painter’s tape.
Measure each old shroud from center of the top eye to center of the bottom eye and enter the length and diameter into your notebook. This is the “assembly” length and is the total finished length.
Measure and Cut New Rigging
Gather the top and bottom terminals (including turnbuckles etc) that you will use for the this particular shroud, either removing them from the old rig if you are reusing, or the new hardware if you are replacing it. You need two numbers – one is the length of top hardware from the center of the eye to where the wire will start when inserted in the terminal – write this down. Then the second number is from the eye of the bottom hardware – including turnbuckles – up to where the wire will end when assembled. Add these two numbers together – top and bottom – this is the “hardware length” of the new rig. Subtract “Hardware length” from the “assembly length” to get “Cut Length” – the actual length of wire that you need. Write this down.

After you finish documenting the lengths and cut lengths of all the shrouds, you are ready to start cutting (and labeling!) wire. It is simplest if you do all wires of one diameter before moving to new wire.
Measure and Cut. Lay the new wire on the mast track and slide the jig you made onto the wire. Measure the cut length carefully and mark the wire with sharpie. You can cut it in place, but it would be best to move the wire to a workbench with a vise. Clamp the jig in the vise and slide the wire until the mark is centered in the block. Using a hacksaw cut the wire. Slide the block past the cut, ready for the next cut.
Tape both ends of the cut shroud so the strands don’t unravel.
Label the wire (“Lower Port Aft” or whatever). Roll, tape, and set aside.
Repeat for all the wires of this diameter and then repeat for each diameter wire.
Install Terminals
Use the instructions for the type of terminal you are using. We used Sta-Lok terminals and these instructions . In most instances you will place a terminal eye at the top and the terminal eye connected to a turnbuckle at the bottom of the wire. Although many people put 5200 (NOT recommended) or Silicon sealant into the terminals before inserting the wires, Sta-Lok doesn’t actually recommend this. We did not use Silicon this time.
We spent approximately 2-3 days to cut the wires for our two masts and apply the terminals. The wire and terminals we bought at Fisheries Supply. Even including the extensive measuring and record-keeping this is straight-forward work that most people could handle.
I think I will measure in centimeters next time. Less risk of arithmetic and recording errors!
I would love to hear from any of you about your own re-rigging experience or questions you have about doing this yourself.
Share this:
- Click to share on Twitter (Opens in new window)
- Click to share on Facebook (Opens in new window)
- Click to share on WhatsApp (Opens in new window)
This site uses Akismet to reduce spam. Learn how your comment data is processed .
As the other half of the described rerig there are a few things I would do differently. I would scrutinize the existing rig more closely, top and bottom, of each shroud and stay. I assumed that the pin sizes would be the same on both ends of each piece of rigging which turned out not to be the case on several. I would take far more photos of each tang and it’s attendant connections than I think necessary which would simplify reassembly. I would use StaLok studs at the turnbuckle end of each shroud and stay rather that toggles. It … Read more »
Stay in touch - sign up for our newsletter for occasional news from Eurybia and her crew.
Your Boat Name:
Email address:
- Privacy Policy
“Live in the sunshine, Swim the sea, Drink the wild air” --Emerson
About This Site
SailingEurybia is a WordPress site. The theme is a version of the Genesis Sample Theme developed by Eurybia-Marie . ©2018
- New Sailboats
- Sailboats 21-30ft
- Sailboats 31-35ft
- Sailboats 36-40ft
- Sailboats Over 40ft
- Sailboats Under 21feet
- used_sailboats
- Apps and Computer Programs
- Communications
- Fishfinders
- Handheld Electronics
- Plotters MFDS Rradar
- Wind, Speed & Depth Instruments
- Anchoring Mooring
- Running Rigging
- Sails Canvas
- Standing Rigging
- Diesel Engines
- Off Grid Energy
- Cleaning Waxing
- DIY Projects
- Repair, Tools & Materials
- Spare Parts
- Tools & Gadgets
- Cabin Comfort
- Ventilation
- Footwear Apparel
- Foul Weather Gear
- Mailport & PS Advisor
- Inside Practical Sailor Blog
- Activate My Web Access
- Reset Password
- Customer Service

- Free Newsletter

Beneteau 323 Used Boat Review

How to Perform Your Own Pre-Buy Inspection

C&C 40 Used Boat Review

Sabre 386 Used Boat Review

Preparing Yourself for Solo Sailing
Your New Feature-Packed VHF Radio

Preparing A Boat to Sail Solo
Solar Panels: Go Rigid If You have the Space…

Ground Tackle Inspection Tips

Shoe Goo II Excels for Quick Sail Repairs

When Should We Retire Dyneema Stays and Running Rigging?
Rethinking MOB Prevention

Can You Run a Marine Air-Conditioner on Battery Power?

An Unusual Sailboat Shines a Light On A Sustainable Future

Is It Time to Get an Electric Dinghy Motor?
Worship Your Universal M-Series Diesel With the Marinized Kubota Block

Battle of the Teak Cleaners — Snappy Teak-Nu vs. Star Brite

New Seacocks for the Offshore Sailor
Bottom Paint Care

Quick and Safe Sail Cleaning

Are E-bikes Worth the Extra Weight and Cost?
How to Handle the Head

The Day Sailor’s First-Aid Kit

How to Select Crew for a Passage or Delivery

Re-sealing the Seams on Waterproof Fabrics

Waxing and Polishing Your Boat

Reducing Engine Room Noise

Tricks and Tips to Forming Do-it-yourself Rigging Terminals

Marine Toilet Maintenance Tips

Learning to Live with Plastic Boat Bits
- Inside Practical Sailor
Swaged Rigging Terminal Failures Raise Concern
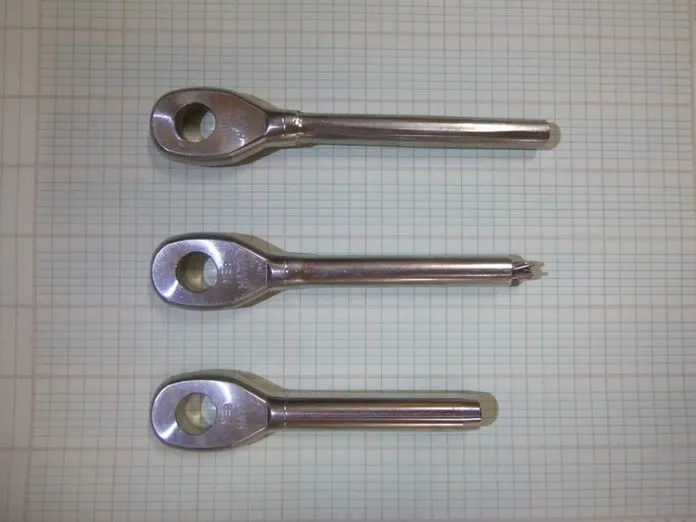
Among the many chores to add to the spring to-do list, a rig inspection should rank high. For sailors in the higher lattitudes who unstep their mast each season, this is the easiest time to inspect stem-ball fittings, tangs, and other mast hardware that is usually inaccessible withouth going aloft.
Last year Port Townsend rigger Brion Toss guided us through the inspection process, highlighting common warning signs. In the upcoming April issue of Practical Sailor, Toss again weighs in on the arts of sailboat rigging with an analysis of mechanical, screw-on terminals from Hi-Mod (Hayn), Sta-Lok, and Norseman. The report, which involved breaking several samples and documenting their failures, is the second part in an ongoing series on rigging. The first part, which included a step-by-step description of assembling a screw-on terminal , appeared in the June 2015 issue of Practical Sailor.
The pull-to-failure tests that Toss carried out for the upcoming issue highlighted another concern that he didnt mention in his rig inspection article-out-of-spec swages. Although corroded or cracked swage fittings have been know to be a common point of failure on older rigs, the environment and working loads are almost always the main contributing factors. But our recent tests suggest that the weaknesses on some terminals may begin on Day One and be the result of flawed swaging tools. It is important to be clear that the swages themselves are not at fault here; it was the process of swaging that apparently contributed to the failure.
For our initial pull tests, the wire rope used for testing (5/16-inch was used for most tests) was fitted with a swaged eye and then broken. The aim of this exercise was to determine a benchmark for the screw-on terminals. However, during the first round of this testing, Toss was surprised to see that wire failures on the newly assembled fittings were occuring at loads that were 10 percent lower than the wires rated tensile strength-and the failures were occuring at or near the swage, suggesting that it had contributed to the failure. This was particularly mysterious, since the swaged-end fittings were applied by a rotary swage machine, considered to be a very reliable way to form swaged terminals.
Only after Toss took calipers to some newly swaged ends did he realize what was causing the failures. The shop hired to do the swaging was using a rotary swage machine that was out of spec. As a result of this experience, Practical Sailor is urging sailors to double check before ordering swaged rigging to ensure the swage machine is in spec, and to confirm that the finished swages are within the specified diameter. To check existing fittings, Ronstan offers guidelines on its website, http://www.ronstan.us/marine5/rigging rollswaging_data.asp . (If you have trouble with the link, try Googling “Ronstan Rigging Product Roll Swaging Specifications.”)
Keep in mind that most rigging has a high safety factor that will tolerate a 10 percent loss in strength, but as rigging ages, the factors that can contribute to rig failure begin to compound. There is no reason to add out-of-spec swages to the mix. While other industries that use wire rope in structural applications establish specific standards for performance, currently there are no standards in place for boat riggers to follow. Previously, the American Boat and Yacht Council has discussed having such standards and we would encourage them to look into this again. In our view, consumers should be able to know that their rig and its components have been assembled by someone who is properly trained in the art and in a fashion that meets a certain minimum standard.
RELATED ARTICLES MORE FROM AUTHOR
Thanks for the article on the entirely too obscure subject of marine terminal swaging. I recently bought all new standing rigging for my boat and during the process had occasion to see two swages with some curvature in the shank. This left me unsettled as to why and whether it foreshadowed problems. So I went off on a tear researching online and was surprised to find the subject poorly covered by the sailing community. There is plenty on indicators for old rigging: rust spots cracks etc, and how to’s for mechanical terminals but good discussion on possible defects in new swaging such as modest variations in swage form (lines, ring patterns etc) were rare to say the least. Basically the average sailor buys these things from their rigger on good faith and the assurance those “very expensive” machines do the magical thing and we should not worry. If in fact you know of some good sources on this topic please spread the word, I’d love to be better educated! Anyway, I think the topic needs much more exposure and “transparency”
LEAVE A REPLY Cancel reply
Log in to leave a comment
Latest Videos

Bavaria C42: What You Should Know | Boat Tour

Universal Diesel Engines – What You Should Know

Tayana 37: What You Should Know | Boat Review

Monitor Your Whole Boat From Home On A Mobile App
- Privacy Policy
- Do Not Sell My Personal Information
- Online Account Activation
- Privacy Manager
- Billing Terms and Conditions
- Shipping and Return Policy
- Shopping Cart

IMAGES
VIDEO
COMMENTS
Day sailors and coastal cruisers do fine with wire rigging fitted with swage terminals. This is partially due to sound engineering, but it is also because of the typical profile of such sailors. ... Rod rigging makes sense on race boats. And on a performance at-all-cost, ultralight displacement boat (ULDB) with carbon spars, fiber-rigging fits ...
All Sta-Lok Terminals are reusable, manufactured from Type 316 stainless steel, and have a long life span. Key Features: Reusable* alternative to swage. Easy to install. Only basic hand tools required. Manufactured from 316 Stainless Steel. Packed for 1x19 wire as standard. Different wedges are available to terminate 7 strand and compacted wire ...
Discover a comprehensive selection of sailboat rigging ranging from specialty wire rope and terminals to swaging tools and rigging pins. Whether replacing worn running rigging lines or updating aging standing rigging wires, we provide everything required - from turnbuckles and toggles to swagers and crimpers - as part of a complete rigging ...
Hayn has been engineering and manufacturing marine, architectural, and industrial rigging hardware since the late 1950s. Hayn's commitment to advanced automation, latest design technology, and manufacturing techniques give them a distinct advantage over competitors. The Hi-MOD mechanical terminal is the latest approach in swageless fittings.
Type 1: Boats up to 250 lbs Dollies. Type 2: Laser, Byte & Invitation Dollies. Type 3: Curled Gunwale Boats Dollies. Type 4.1: Small/Med Bowsprit Boats Dollies. Type 4.2: Heavier Sprit Boats Dollies. Type 5: Heavier Doble-Handed Boats Dollies.
Sailing Services is a manufacturer and supplier of custom rigging and sailboat hardware for marine and architectural applications.
The latter is referred to as the mechanical or swageless fitting. SWAGE FITTINGS: High quality swage fitting manufacturers used by The Rigging Company (TRC) include: Hayn, Alexander Roberts Co., Stalok, C Sherman Johnson, Global BSI, and up until recently Gibb a parent company of Navtec. A swage fitting has more length and is a slimmer design ...
rigging. standing rigging. rigging terminals. CONTACT WEST MARINE. Live Chat. 1-800-262-8464. Store Locator. Shop the best selection of Rigging Terminals from West Marine. Visit for products, prices, deals and more!
4. Mechanical terminals allow sailors replace a broken shroud or even re-rig their own boat without hiring a professional rigger with a swage machine. Although the process of fitting a mechanical terminal is within reach of a competent do-it-yourself, there are a few pitfalls to avoid. Fortunately, we had the help of the late Brion Toss, one ...
UNF Thread. $11.37. RF1512M0405 Threaded Swage Terminal for 4mm Metric Wire, 5/16" Thread. UNF Thread. $14.54. RF1512M0504 Threaded Swage Terminal for 5mm Metric Wire, 1/4" Thread. UNF Thread. $12.00. RF1512M0505 Threaded Swage Terminal for 5mm Metric Wire, 5/16" Thread.
Aug 14, 2015. It's one of the most important features on a sailboat, but many owners put standing rigging at the back of their minds when it comes time to do their pre-season safety checks. A prudent sailor should inspect his or her standing rig at least once each season and should know when the time comes to replace most or all of it.
Sta-Lok wire terminations standing rigging forks eyes insulators turnbuckle studs and parts are self fit cable terminals. 09 pricing: Rigging Only e-mail: [email protected] Voice line: 508 992 0434 Fax: 508 992 ... MAIN SAIL TRACK SYSTEMS. STRONG. HARKEN. ANTAL. STANDING RIGGING. NORSEMAN. STA-LOK. HI-MOD. SWAGE TERMINALS and toggles.
Colligo Marine offers high-performance synthetic rigging and hardware solutions for sailboats and racing yachts. Our innovative products are designed to give racers a competitive edge with their strength, lightness, and reliability. Trust Colligo Marine for a safer and faster racing experience. Colligo Marine has the rigging solutions you need ...
Terminal ends for both ends of each shroud. You will need new mechanical terminal ends for a swaged rig. If your rig currently has mechanical ends, you can reuse these at least once and just replace the cones. If replacing the cones get some extras. Sta-Lok and Hayn still make these parts. Hayn is probably the best and most expensive.
If you are more of a do-it-yourself sailor, we sell Sta-Lok, and Hi-Mod fittings designed to be fitted on site. Huge Inventory of Rope and Sailboat Hardware. Rigging and Lifeline Shop. Splicing Shop. Expert Knowledge. [email protected]. (305) 758 1074. Sailing Services Catalog. Find A Rigger.
With more than 50 years of supplying the global marine industry, we offer an extensive range of stainless steel marine fittings, turnbuckles, and terminals for Marine wire rope rigging. Sta-Lok is the preferred choice for professionals and sailboat owners. Please also check out our Tension Rod Range for Bobstay's and below-deck tie rod solutions.
1-43 results of 43. 1. Hayn rigging has been setting the standard for quality stainless steel rigging hardware for over 60 years. Hayn Hi-Mod compression fittings and Hayn turnbuckles are manufactured using skilled craftsman and quality materials, while still remaining price competitive. Whether you need jaw to jaw turnbuckles, rigging pins ...
You can trust your standing rigging to Sta-Lok swageless terminals - so shop Fisheries Supply today! Can't find what you're looking for? Let us help. 206-632-4462. Email. Fisheries Supply carries a wide variety of marine products and brands, including STA-LOK fittings and sailing rigging hardware. Browse our selection today!
To make visions become reality,choose Sta-Lok. Sta-Lok is a UK manufacturer specialising in the design, manufacture and supply of high-quality products and solutions for stainless steel wire ropes and tension rod systems. Sta-Lok's stainless steel rigging fittings are designed and engineered to complement the most beautiful boats, buildings ...
We manufacture our rigging using the highest quality stainless steel components from Sta-Lok, Hayn, Alexander Roberts, CS Johnson, Schaefer and more. Our experienced craftsmen fabricate top quality shrouds and stays using rotary & passive die swaging techniques. Our team also has vast experience with mechanical terminals from Sta-Lok and Hi-Mod.
In the upcoming April issue of Practical Sailor, Toss again weighs in on the arts of sailboat rigging with an analysis of mechanical, screw-on terminals from Hi-Mod (Hayn), Sta-Lok, and Norseman. The report, which involved breaking several samples and documenting their failures, is the second part in an ongoing series on rigging.
Large diameters and in-house rod heading available. Please call or email [email protected] for details. Features. Nitronic 50 Straightened Rod. High Strength and Low Stretch. Highly Polished for Marine Use. Solid Strand Stainless Steel. R505-004. Nitronic -4 Straightened Round Rod.